Welcome to Weye Model Cars 🎉 Your destination for premium diecast collectibles.
Beginner's Guides Collecting & Care

The Complete Guide to Cleaning, Displaying, and Protecting Model Cars

Part 5 of the Weye Model Cars Beginner's Guide, featuring a composite of cleaning tools, display cabinets, and 1:64 dioramas to illustrate proper model care.

Welcome to Part 5 of our Ultimate Beginner’s Guide. In the previous chapters, we navigated the complex world of scales, materials, and brands. But now that you’ve spent time and money building your collection, your role is shifting. You are no longer just a hunter; you are a guardian.

Don’t let bad habits ruin your hard work. Today, we tackle the unglamorous but essential side of the hobby: maintenance. Proper display isn’t just about protection—it’s about respect for the machine. From fighting off dust and UV damage to choosing the perfect cabinet, this guide will help you curate a display that preserves both the value and the joy of your collection, ensuring your models look as good in ten years as they do today.

How to Clean Model Cars: A Step-by-Step Guide

To maintain the “mint” condition of a high-end collectible, a simple wipe is often not enough. Following a structured cleaning procedure ensures you remove contaminants without risking the integrity of the paint or delicate photo-etched parts. Here is our recommended professional cleaning sequence:

  1. Initial De-dusting: Use a high-quality microfibre cloth or a burst of compressed air to remove loose surface dust. This prevents scratching the clear coat during the subsequent wiping steps. Household dust often contains micro-silica particles; if rubbed directly into a dry clear coat, these particles act like microscopic sandpaper, creating irreversible swirl marks.
  2. External Deep Clean: For stubborn stains or grease, dampen a soft cloth with distilled water and a drop of mild, pH-neutral soap. Gently wipe the affected area, avoiding any water-soluble decals or vintage tampos. It is critical to use distilled water rather than tap water, as tap water contains dissolved minerals (like calcium and magnesium) that will leave etched hard-water spots on the paint once the moisture evaporates.
  3. Pat Drying: Never rub a wet model. Use a fresh, dry microfibre cloth to gently pat the surface dry to avoid water spots or streaks.
  4. Optional Polishing: For models with a high-gloss finish, apply a specialized model wax (like Tamiya Wax) using a fine applicator. This adds a layer of UV protection and restores that “showroom shine.”

Best Cleaning Tools for Scale Model Car Maintenance

Equipping yourself with the right tools is half the battle. Use the table below to assemble your professional detailing kit:

Cleaning ToolPrimary ApplicationMaintenance & Precautions
Microfibre ClothsBasic dusting, large surface wiping, and paint polishing.Wash separately; strictly avoid fabric softeners as they can leave residues that scratch the paint.
Detail/Makeup BrushesDeep cleaning of crevices, grilles, and wheel interiors.Clean thoroughly after each use and store in a dust-free container to prevent grit accumulation.
Distilled Water & Mild DetergentRemoving stubborn body stains or slight adhesive residue.Avoid all household chemical cleaners to prevent corrosion of plastic or resin components.
Precision TweezersRemoving tiny foreign objects or handling small moving parts.Keep tips aligned and exercise extreme caution to avoid accidental paint chips.
Compressed AirNon-contact removal of deep-seated dust from fragile areas.Control the pressure strength and distance to avoid blowing off antennas or side mirrors.

Maintenance 101: 4 Common Mistakes That Devalue Collections

Even experienced collectors can make mistakes in the heat of the moment. Here are four common dos and don’ts of model car maintenance to keep in mind.

❌ Mistake #1: Handling with Bare Hands
  • The Issue: Our fingers naturally carry oils and sweat. Over time, these can smudge the paint and potentially leave permanent fingerprints or marks on delicate finishes. At a microscopic level, the sebum and acidic compounds found in human sweat create a chemical reaction when left on a model’s clear coat. Prolonged exposure to these biological oils permanently etches the paint layer and accelerates the peeling and dissolving of delicate water decals (tampos).
  • The Better Approach: Try to handle models by the main body or the chassis underneath. For the best protection, wearing cotton gloves is a simple habit that keeps the paint pristine.
❌ Mistake #2: Cleaning with Alcohol or Household Cleaners
  • The Issue: Harsh chemicals can be disastrous for models. They can dissolve water decals (tampos), dull the clear coat, or damage plastic windows. Strong solvents, such as rubbing alcohol, easily destroy the surface tension of fragile resin models. Furthermore, alcohol triggers an irreversible “whitening” or “fogging” effect on transparent acrylic windows by breaking down the polymer chains.
  • The Better Approach: For loose dust, a soft, clean makeup brush is the best tool, as it reaches crevices without force. A can of compressed air (used for electronics) is also effective for “touchless” cleaning, provided you use short bursts from a safe distance. For fingerprints, a gentle wipe with a clean microfiber cloth is usually sufficient. The Right Tools: Tamiya Wax, Soft Brushes & Gloves
Infographic guide on how to clean diecast model cars correctly, contrasting bare hands and alcohol (wrong) with cotton gloves and soft brushes (correct).
The Right Tools: Tamiya Wax, Soft Brushes & Gloves
❌ Mistake #3: Leaving Models “Naked”
  • The Issue: Leaving models exposed on an open shelf invites dust buildup that is hard to remove later. It also exposes them to humidity changes that can damage packaging. Environmental exposure goes beyond just dust. Unfiltered UV light from windows causes photodegradation, fading rich paint pigments over time. Additionally, severe humidity fluctuations can cause solid resin models to warp, or trigger oxidation processes like “zinc pest” in older diecast alloys.
  • The Better Approach: Give the car a “home.” An acrylic cover or a glass cabinet isn’t just for aesthetics; it’s a necessary shield.
❌ Mistake #4: Lifting by the Wrong Parts (Mirrors & Spoilers)
  • The Issue: It is a natural instinct to grab a car by the roof or wing, but putting pressure on fragile parts like side mirrors, spoilers, and antennas is the fastest way to snap them off. These delicate photo-etched or separately molded parts are often attached with minuscule amounts of cyanoacrylate (super glue). While this adhesive is rigid, it has incredibly low shear strength and cannot support the heavy weight of a dense diecast or resin chassis.
  • The Better Approach: Always pick up the model by the main body shell or cup the chassis from underneath. Treat the small appendages as “look but don’t touch” zones.

How to Protect Model Cars from Dust and UV

Even the most beautifully arranged collection can be ruined by a hostile environment. Leaving models on an open shelf is essentially exposing them to a slow-motion disaster. To preserve your investment, you must defend against these high-level environmental hazards.

1. The Invisible Enemy: UV Light and Photochemical Degradation

Sunlight (UV Rays) is perhaps the most dangerous enemy for any collector. Beyond simple fading, prolonged exposure triggers photochemical reactions that break down the molecular bonds in the paint’s clear coat.

  • Paint Fading: UV rays cause “color shifting,” where vibrant reds turn orange and deep blues turn grey.

  • Decal Dehydration: Water-slide decals (tampos) are particularly vulnerable. UV radiation dehydrates the adhesive layer, causing the decals to become brittle, crack, and eventually peel off the model’s surface.

  • The Shield Strategy: Strictly avoid placing display cabinets near windows. Always treat direct sunlight as a permanent threat to the model’s “mint” status.

2. Humidity Control: Preventing Zinc Pest and Resin Warping

Humidity is a silent killer that can seep even into glass cabinets.

  • Zinc Pest (Intergranular Corrosion): In diecast models, high moisture reacts with trace impurities (like lead or tin) in the zinc alloy. This causes the metal to expand from within, leading to surface bubbling, deep cracks, and eventually the total crumbling of the chassis.

  • Resin Warping: Unlike diecast, resin is a porous material. High humidity can cause resin components to absorb moisture and swell, leading to permanent structural warping or “slumping” of the body over time.

  • The Fix: Place silica gel (desiccant) in the back corners of your display to actively absorb moisture and prevent oxidation.

3. Advanced Dust Defense: Why You Need Air Purifiers

While enclosed acrylic or glass cabinets are the best defense strategy against visible dust, they are not airtight.

  • Sub-micron Particles: Microscopic suspended particles can still infiltrate cabinet gaps. Over years, these build up into a “static film” that is difficult to remove without scratching the paint.

  • The Pro Tip: Deploying a HEPA-filter Air Purifier near your main display area is essential. By filtering out fine particulate matter before it settles, you create a “clean room” environment that drastically reduces the frequency of physical cleaning—the stage where most accidental damage (like snapped mirrors) occurs.

4. Safe Lighting for Model Car Displays: Why LEDs are Best

Lighting makes a collection pop, but heat is a killer.

  • Avoid: Halogen bulbs or direct sunlight, as they emit both UV and heat.

  • Use: Low-heat LED light strips. They provide bright, neutral light without the damaging thermal output that can dry out rubber tires or melt delicate plastic parts.

The Ideal Sealed Environment: Premium Acrylic Case with Suede Base

How to Display Model Cars: The Art of Curation

Handling is about safety, but arrangement is about impact. There is a fine line between a stunning collection and a messy parking lot. To transform your display into a high-end museum exhibit, you must move beyond simple storage and embrace the art of curation.

Theme-Based Arrangement: Crafting a Visual Narrative

To make your collection visually stunning, try grouping your models by theme within your display case. This creates a sense of cohesion and professionalism.

  • Group by Marque: Dedicate one shelf exclusively to Porsche or Ferrari to show their evolution.

  • Group by Era: Arrange your 1960s American muscle cars together to capture the spirit of a decade.

  • Group by Color: A visually striking technique is to arrange cars by color gradient, regardless of make.

  • Create a “JDM Corner”: Keep your Japanese imports together to create a focused, culturally distinct section in your cabinet.

The Visual Power of a Unified JDM Theme

Leveling Up: Bringing Your Collection to Life with Dioramas

Let’s be honest: rows of cars lined up on a glass shelf can sometimes look like a crowded parking lot. If you want your collection to stop people in their tracks, you need context. Adding a diorama doesn’t just display the car; it captures a moment in time.

  • Match the Vibe: Don’t just buy any scene; match it to your theme. A clean, LED-lit showroom diorama makes a Ferrari look expensive, while a gritty, graffiti-covered street corner brings a JDM drift car to life. The background tells the viewer where the car belongs.

  • The “Scale” Effect: A car sitting alone is just an object. But place a tiny mechanic fixing a tire, or a driver holding a helmet next to it, and suddenly the realism explodes. This is where brands like MoreArt shine—their figures provide the necessary size reference that tricks the eye into thinking it’s looking at a real car, not a toy.

  • Unlock Desktop Photography: Once you have a scene and figures, you have a photo studio. You don’t need a professional camera; the lighting and detail from a good diorama setup allow you to take cinematic car photos right from your smartphone.

Level up your display: 1:64 Double-Deck Parking Workshop

Packaging & Resale Value: Should You Keep Diecast Model Boxes?

It’s the dilemma every collector faces eventually: your display cabinet looks amazing, but your closet is overflowing with empty cardboard boxes. Is it really worth the storage space to keep them? The short answer is: Yes.

From a financial standpoint, the original packaging is not just cardboard; it is a crucial part of the asset. In the collector market, a model listed as “Mint in Box” (MIB) can command a price 20% to 50% higher than the exact same model sold “loose” (without a box).

  • For Investment: If you are collecting high-end brands like AUTOart or Motorhelix, the box (and the certificate of authenticity inside) is non-negotiable. Throwing it away is like throwing away cash.

  • For Protection: Beyond money, original boxes are engineered to hold the car perfectly. If you ever move house or decide to sell and ship the model, nothing protects it better than its original “shell.”

The Exception: If you are collecting entry-level models purely for the joy of display, have zero intention of selling, and are extremely tight on storage space, then—and only then—might you consider recycling them. But for everything else? Flatten them, store them, keep them.

Model Car Care & Maintenance Cheat Sheet

Use this quick reference table to keep your collection in top condition.

Care DimensionThe EnemyMechanismProfessional SolutionCommon Trap
HandlingSkin oils & acid sweatPermanently etches the clear coat and dissolves delicate decals.Always wear lint-free cotton gloves; handle only by the chassis or tires.Grabbing fragile side mirrors or spoilers with bare hands.
CleaningAbrasive fabricsCreates irreversible swirl marks and corrodes resin components.Use static makeup brushes, compressed air, and pro-grade microfibre.Using household glass cleaners or alcohol on windows.
StorageHigh humidity (>60%)Catalyzes incurable “Zinc Pest” (intergranular corrosion) in alloys.Use high-capacity silica gel desiccants or electronic dry boxes.Storing original boxes in damp basements or uninsulated attics.
LightingUV & Halogen heatBreaks polymer bonds leading to fading and embrittlement of plastics.Utilize UV-filtering covers and low-heat LED cold light strips.Placing display cabinets next to unshaded, south-facing windows.
DisplayingVisual clutterCreates a dull “parking lot” effect without scale reference.Introduce dioramas and figure accessories to create narrative context.Mixing scales and eras without any logical or thematic grouping.

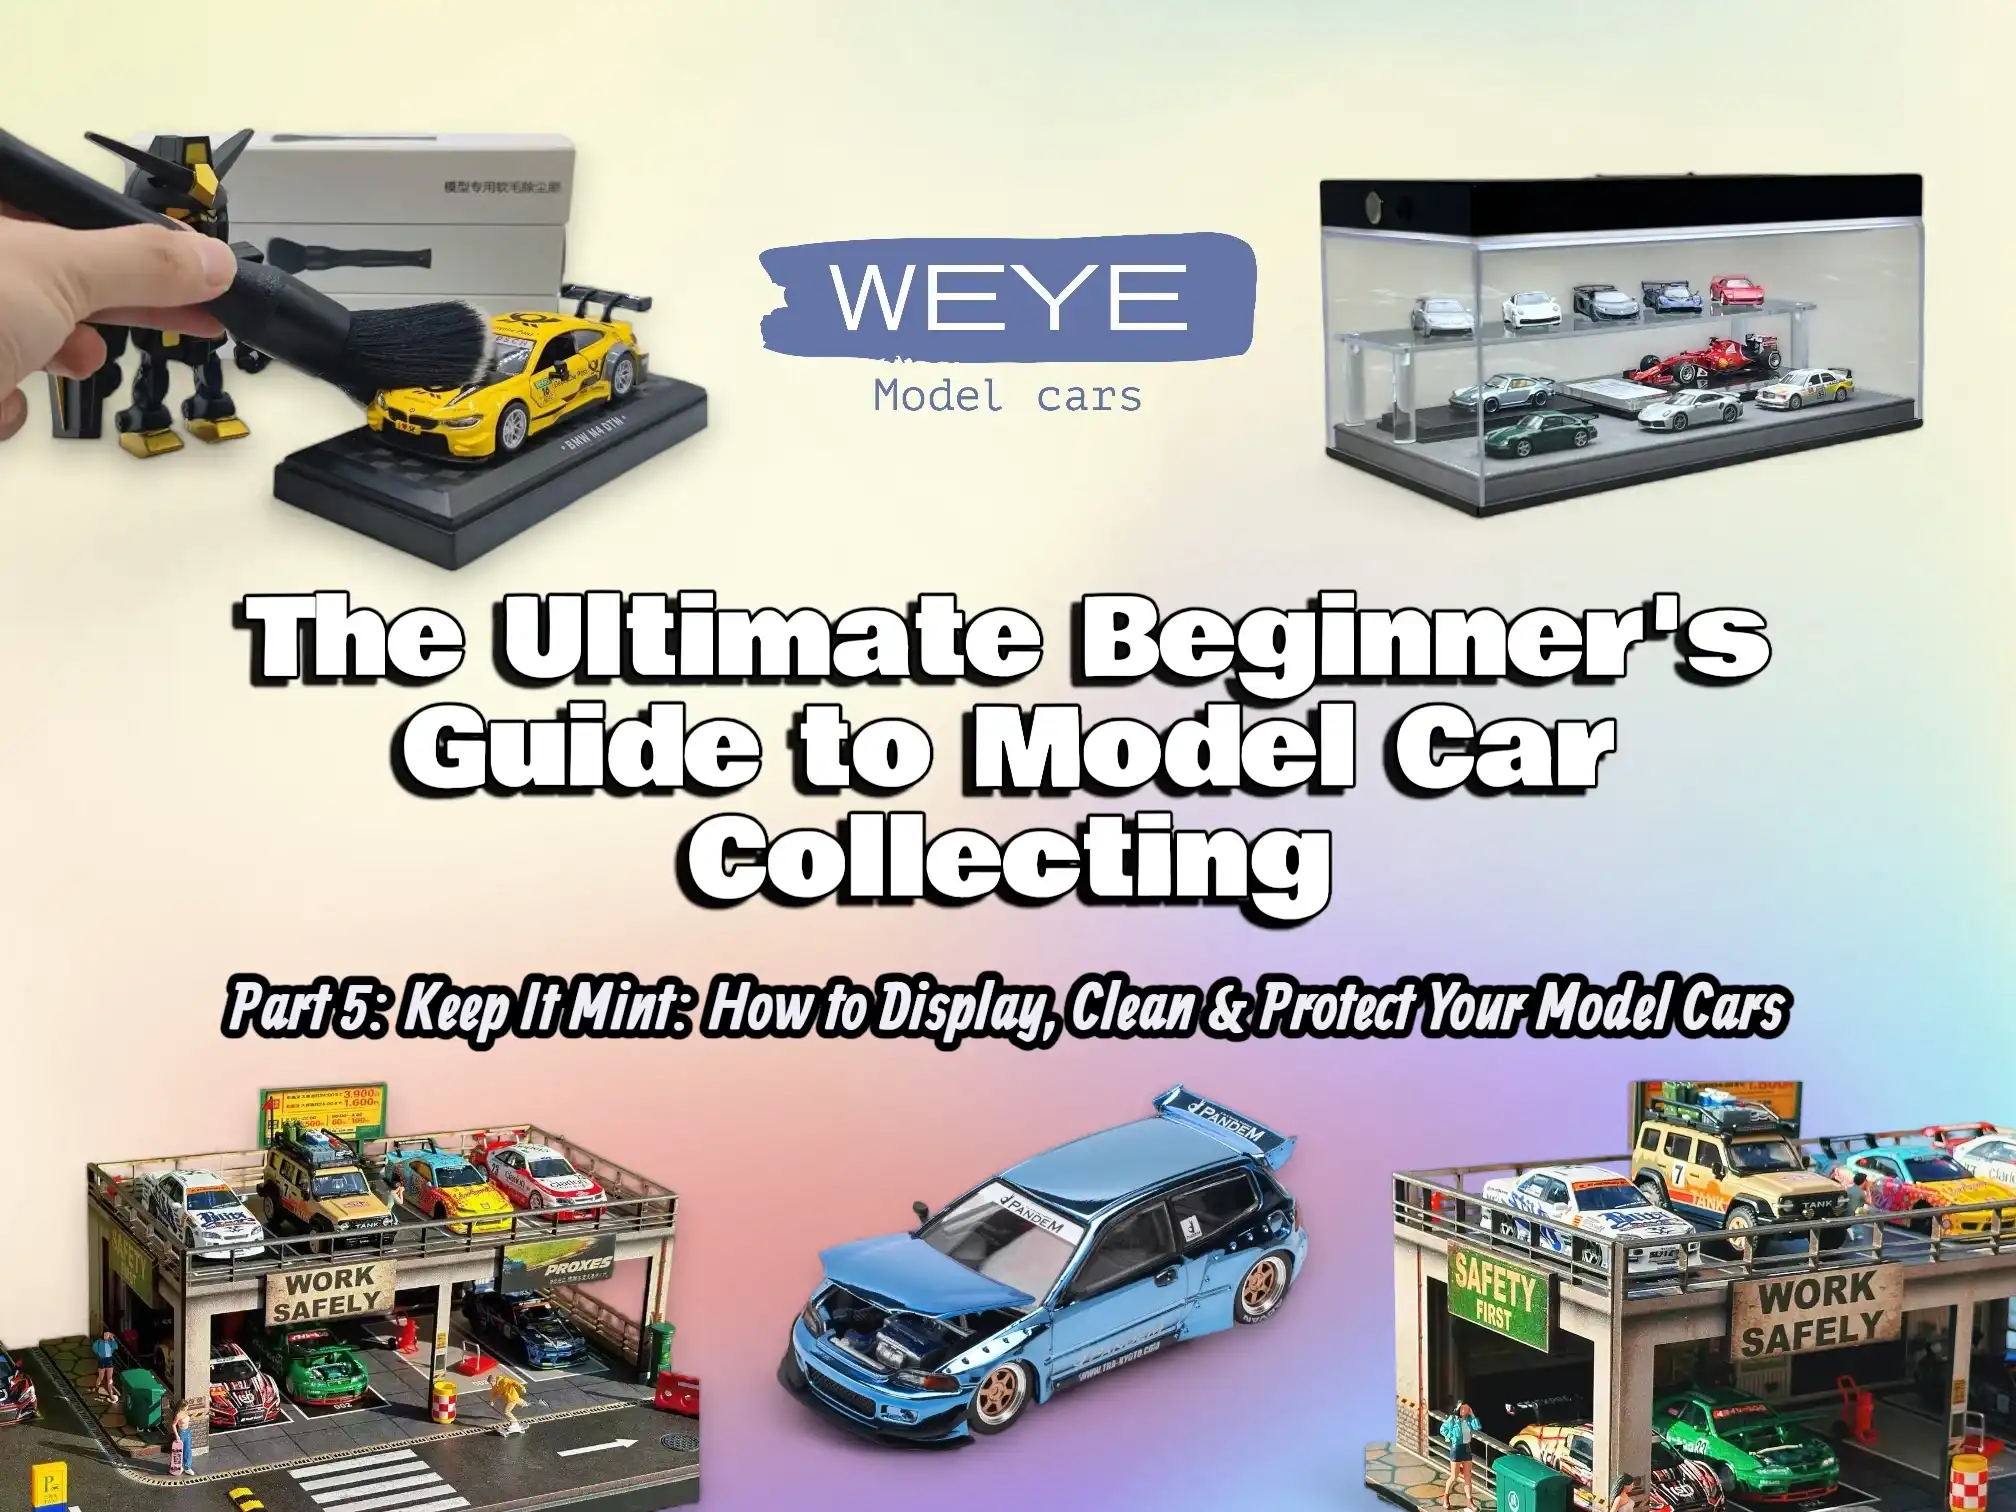
Final Thoughts: From Buyer to Curator

Congratulations! You have completed our Ultimate Beginner’s Guide. We have journeyed through the difference between toys and models, the science of materials, the importance of scale, the hierarchy of brands, and finally, the art of preservation.

However, reaching the end of this guide doesn’t mean the road ends here. We will continue to update our blog with deeper collecting knowledge, the fascinating history behind specific models, and detailed hands-on reviews.

Collecting is a journey, not a race. Whether you have one perfect 1:18 scale supercar or a wall of one hundred 1:64 scale racers, the joy comes from the connection to the machine.

Ready to start your curated collection? Visit us at Weye Model Cars to find your first piece. Happy collecting!

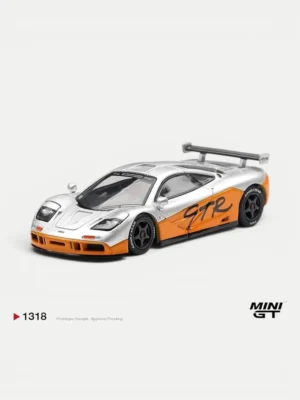
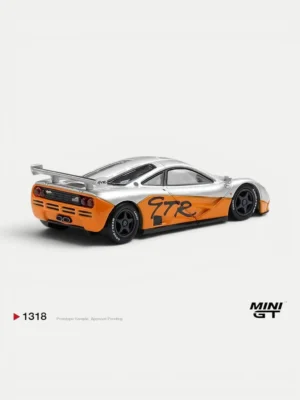
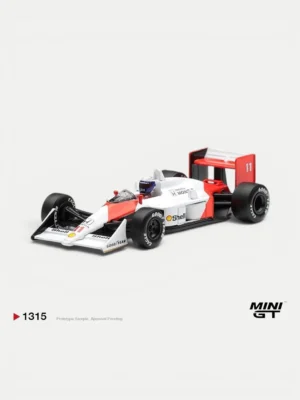
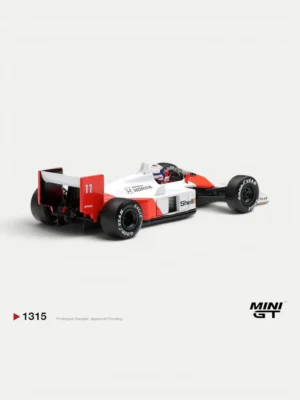
Explore More in Our Collector’s Beginner Guide Series

Leave a Comment

Independently verified
48 reviews